Roller/flywheel Sensor (RPM1)
Sensor Mount
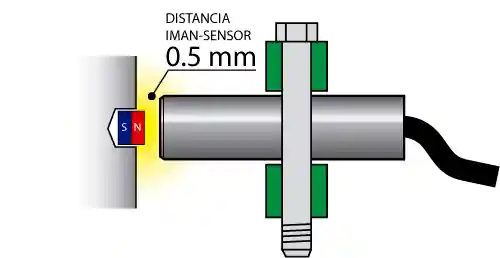
The RPM sensor should be mounted rigid, without any type of rubber or cushioning. It is recommended to use a metal bracket fix it at a distance of 0.5mm to 1mm from the active side of the magnet.
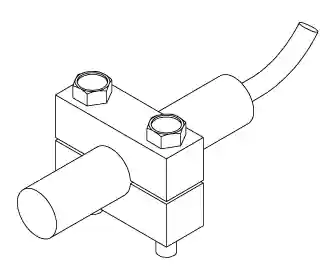
The RPM sensor should be mounted rigid, without any type of rubber or cushioning. It is recommended to use a metal or plastic clamp to fix it at a distance of 0.5mm to 1mm from the active side of the magnet.
Magnet Installation
The magnet must be mounted on the flywheel or side of the roller, preferably away from the axle, although it also works if it is mounted on the axle.
The sensor detects only one side of the magnet. Use the sensor to find the correct side before gluing the magnet permanently: once glued, it is very difficult to remove.
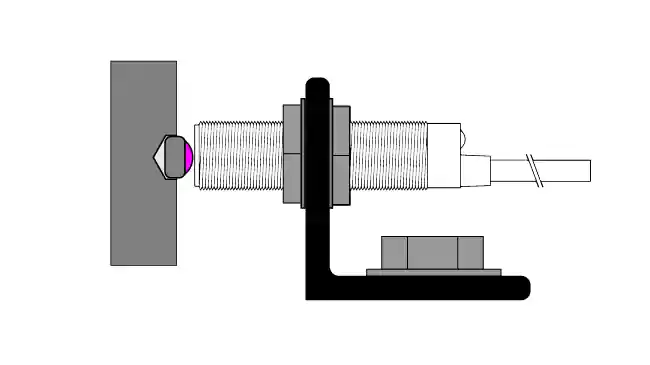
The sensor detects only one side of the magnet. Use the sensor to find the correct side before gluing the magnet permanently: once glued, it is very difficult to remove.
WARNING
Do not glue the magnet without first testing it with the sensor. See TEST below.
Once the active side has been identified, mount the magnet using a 2-component epoxy-type adhesive, with the active side facing the sensor. It is recommended to mount the magnet into a shallow hole on the flywheel or roller.
In the event that the assembly is carried out on a ferromagnetic material such as iron or steel, it is recommended that the magnet is not embedded in the hole, but should protrude approximately 0.5mm. This is to prevent the iron from absorbing the magnetic field lines, which would cause the need to mount the sensor closer to the magnet.
TEST
You can use the interface to test the sensor, identify the active side of the magnet and verify the correct mounting.
- Software must not be open.
- Connect the USB port of the Accudyno interface to the PC.
- Also connect the rotation sensor to the RPM1 input.
- Move the sensor closer to the magnet. You will see the green led on the interface change state from flashing to steady on.
- When removing the magnet, the light will turn off.
- Test both sides of the magnet: only one of them activates the sensor. That is the side that must face the sensor when gluing the magnet.
RPM1 Input Pinout
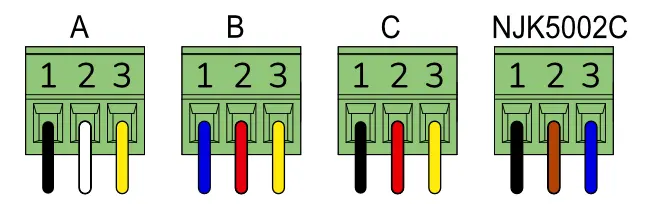
Colors may vary depending on the cable supplier. Check which cable style you have received.
| Number | Function | Style A | Style B | Style C | NJK5002C | Range | Signal No. in Software |
|---|---|---|---|---|---|---|---|
| 1 | Signal | Black | Blue | Black | Black | Digital input w/ 2K pullup | 11 |
| 2 | VCC | White | Red | Red | Brown | Power supply for the sensor +7V on DS models (2025) +5V on earlier models |
|
| 3 | GND | Yellow | Yellow | Yellow | Blue | 0V |
Pulses per revolution: software programmable.
Provided Sensor Specifications
| Type | NJ5002C Hall Effect Sensor |
|---|---|
| Supply Voltage | 5V Nominal / 24V max |
| Magnetic Polarity | Unipolar (activated by only one pole of the magnet) |
| Output Type | Open Collector |
| Working distance | With neodymium magnet ~1 mm |
| Diameter | 12mm |
| Thread | M12 |
| Length | 37mm |
| Cable length | 3.5m (total with extension) |
| Magnet | Neodymium. Diameter 5 or 6mm. Thickness 2.5mm |
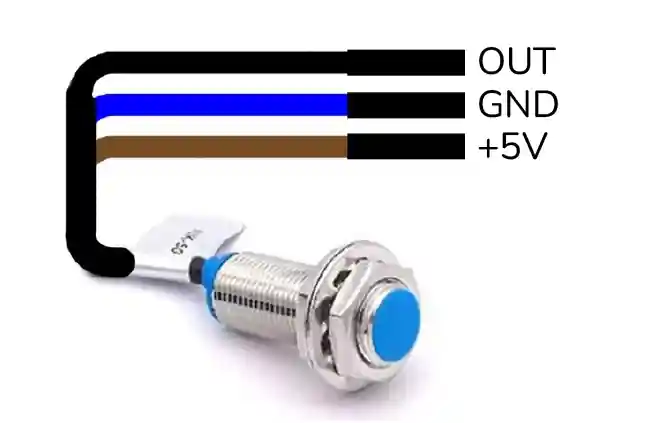
| Connection | Black: Signal / Blue: GND / Brown: VCC |
| Type | Hall Effect Sensor |
|---|---|
| Supply Voltage | 5V Nominal / 24V max |
| Magnetic Polarity | Unipolar (activated by only one pole of the magnet) |
| Output Type | Open Collector |
| Working distance | With neodymium magnet ~1 mm |
| Diameter | 15.9mm |
| Length | 80mm |
| Cable length | 3.5m |
| Magnet | Neodymium. Diameter 5 or 6mm. Thickness 2.5mm |